Logan Lathe Automatic Apron Conversion
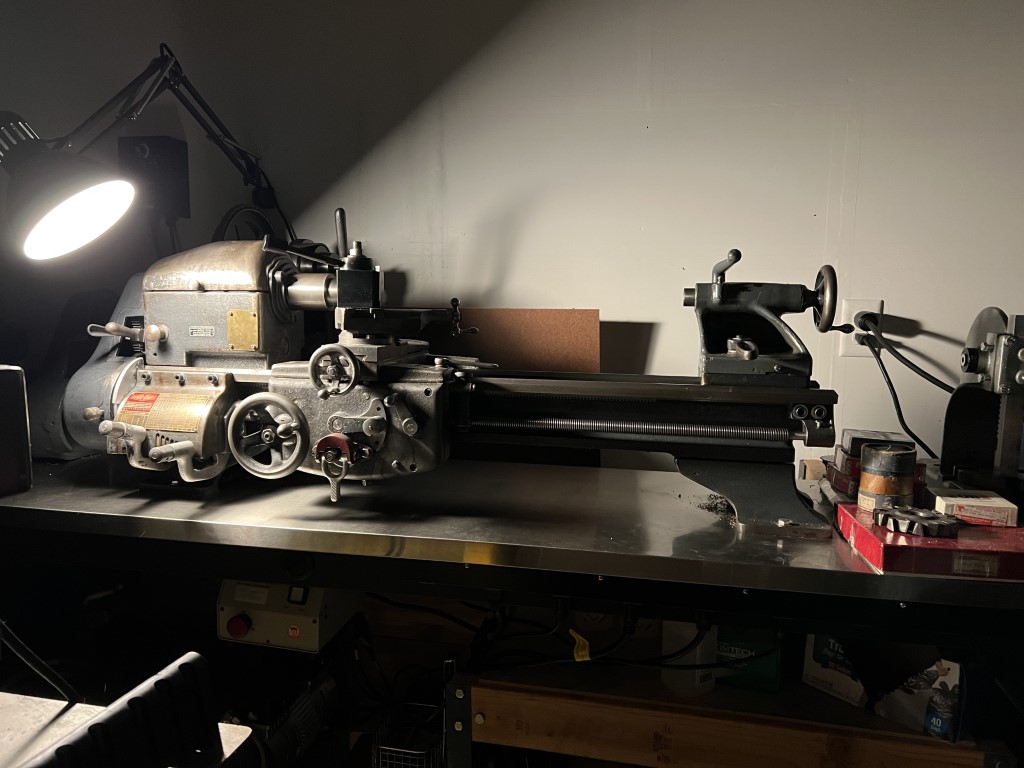
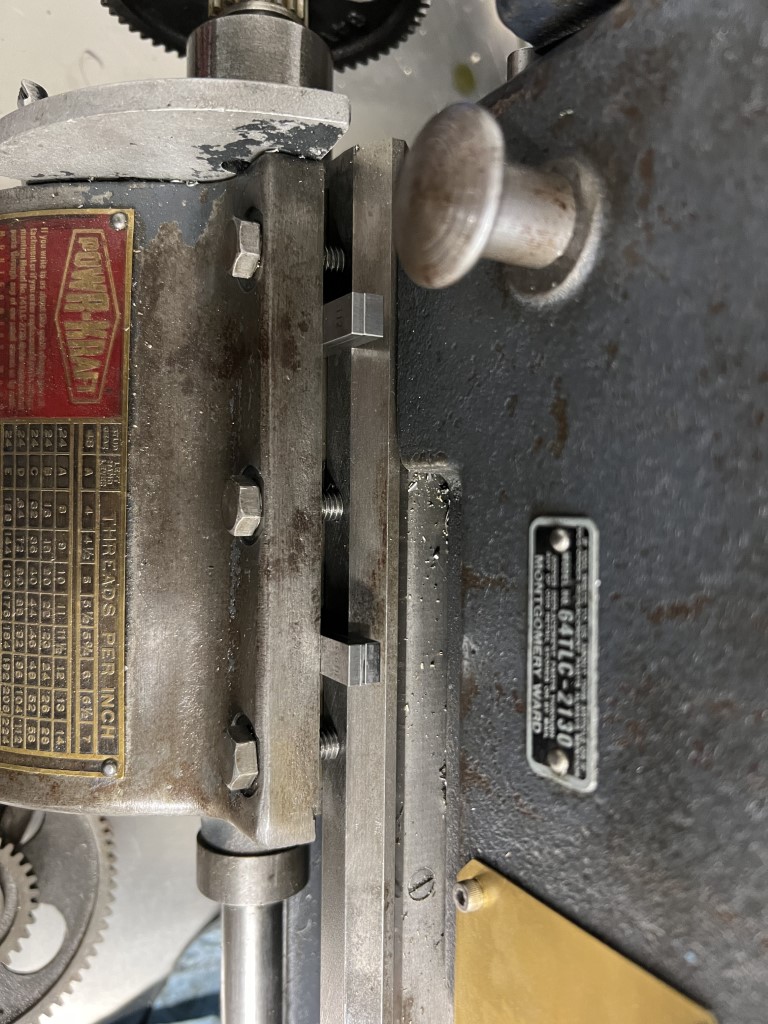
I own a 1946 10” Logan Lathe. It is one of the lathes that Logan manufactured which was resold by Montogomery-Ward.
The machine came to me from a farmer in rural Idaho.
If you aren’t familiar with lathes or their components, I suggest reading about them here.
Additionally, the lathes.co.uk site has a nice section on Logan and the accessories available on their lathes.
Background
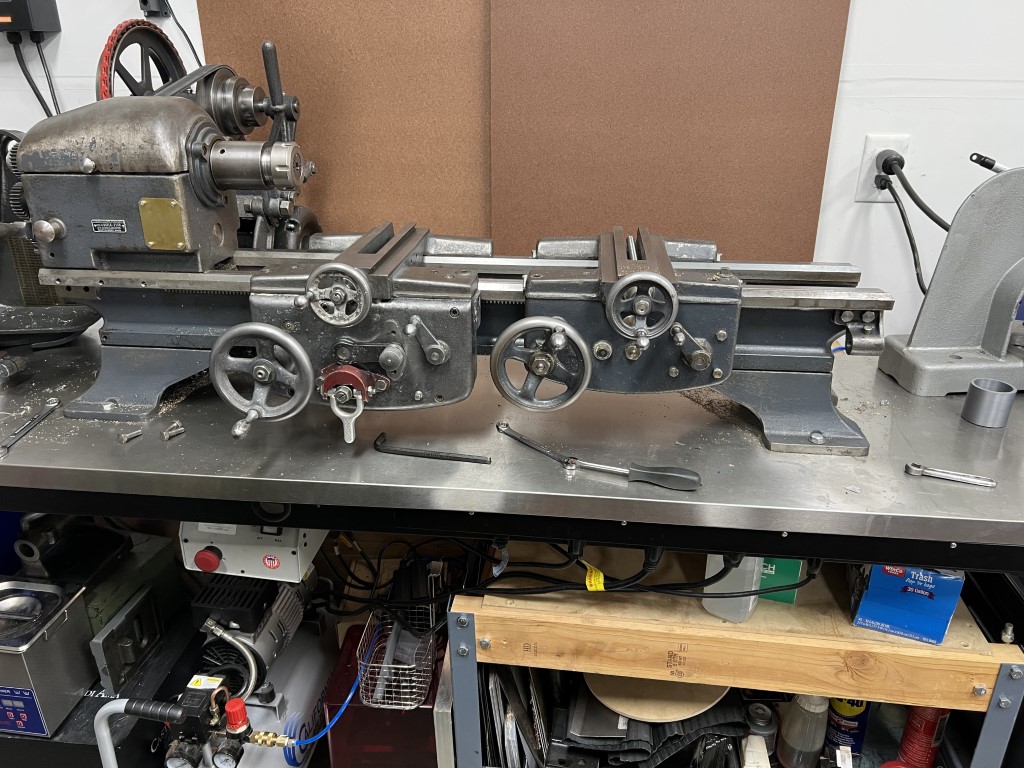
This lathe came with what Logan called their standard apron.
The standard apron can provide power cross-feed and power-longitudinal feeds.
Power longitudinal-feed is provided by half-nuts and quick change gears. half-nut engagement is how single-point threads are formed.
Power cross-feed is driven by a keyway in the leadscrew. This keyway interacts with a pair of miter gears which can drive a spur gear on the cross-slide leadscrew.
My lathe is equipped with a Logan Quick Change Gearbox (QCGB). The gearbox didn’t come with the lathe, it was installed afterwards. This will also get a partial rebuild during this project.
Problems
This setup is a good one in general, especially for a hobby lathe. However, there are a few general problems with it:
- Typical longitudinal power feeds require different change gears than typical thread pitches. Even the QCGB doesn’t eliminate change gear muddling.
- No safety mechanism for longitudinal power feeds if the lathe is crashed. If crashed, something will break, likely the hih torque carrying QCGB spur gears.
- Longitudinal power feeds will wear both the leadscrew and the half-nuts.
These would inevitably prevent me from ever using longitudinal power feeds. Most of my shop time is time-constrained, and extra time spent switching change gears cuts into that.
Notes on QCGB feeds
In case it cannot be found elsewhere on the internet, a Logan QCGB in the standard threading configuration can supply down to 224TPI, or feeds of ~0.0045” per revolution.
Solutions
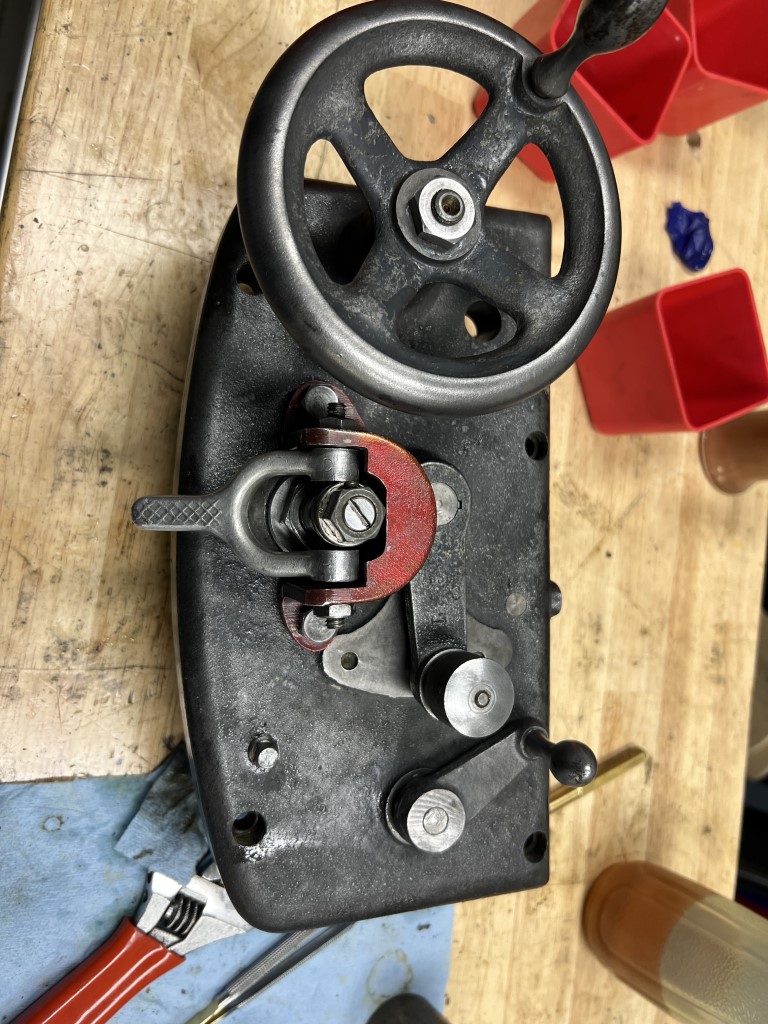
To solve these problems, and to create an interesting project, I decided to replace the standard apron on this lathe with what Logan calls their “Automatic Apron.”
The automatic apron features a friction clutch and additional gear reduction to power both power longitudinal feeds and power cross feeds. The friction clutch is designed to sit in an oil bath as well. Power feeds for both axes are driven from the keyway in the leadscrew, thus eliminating use of the leadscrew thread and halfnuts.
Notes on the Automatic Apron Conversion
Many parts on Logan lathes are interchangeable, between even 10” and 11” swing lathes.
Although people have done the conversion before, many details are not available to the public.
Here are some quick notes:
- The automatic apron requires a saddle that will fit. Standard apron saddles WILL NOT work.
- Many eBay listing are for either the saddle or apron, but not both. Identifying an automatic apron compatible saddle is easy, look for the distance between screws which mount the underside saddle gib. If they are close together (almost touching the cross slide ways) it will NOT fit the automatic apron.
- The automatic apron requires that the leadscrew be moved away from the bed by a certain amount. Check the tables below to see the dimensions that I used.
I found that the automatic apron power feed gear reduction is 1/3 the QCGB setting for longitudinal feeds, and 1/10 the QCGB setting for cross-feeds.
The Plan
- Purchase suitable automatic apron and saddle
- Clean, inspect and identify repairs
- Conduct repairs, if any
- Fit saddle to lathe bed
- Fit apron to lathe bed
- Fit leadscrew to apron
- (not initially planned) refurbish QCGB
The Work
The work section is organized by component, not chronologically.
Apron
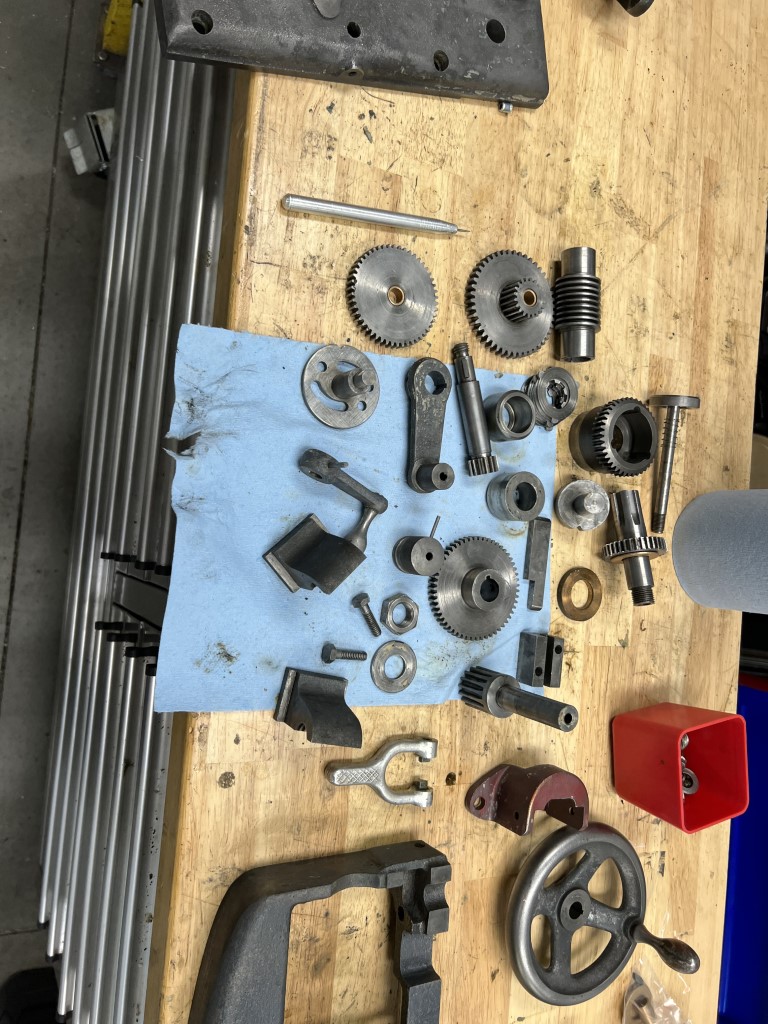
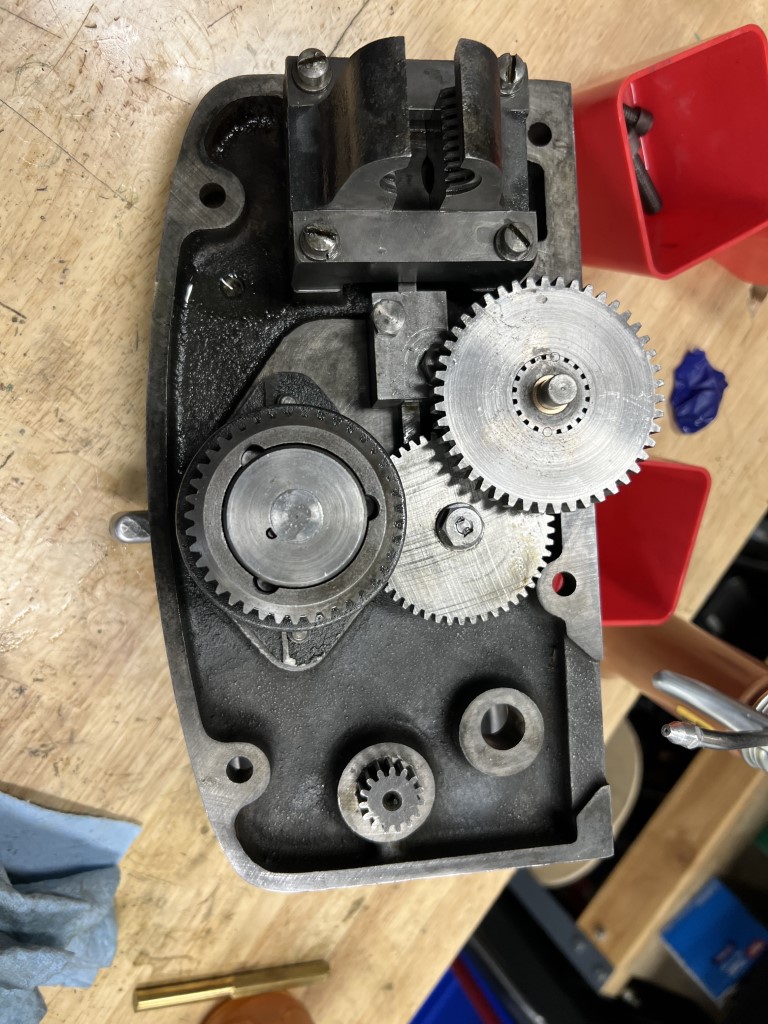
The apron was purchased from eBay. It seems that there are still (as of 2022) quite a few sellers that are parting out Logan lathes. I purchased an apron that looked okay where it counted (worm gear threads were okay, no mechanical damage visible). However, the apron was filthy and packed with chips and dried oil and multiple coats of paint.

Apron Cleanup
Cleaning was a matter of complete disassembly, removing grime, removing old paint, and degreasing.
This process revealed a few worn components.
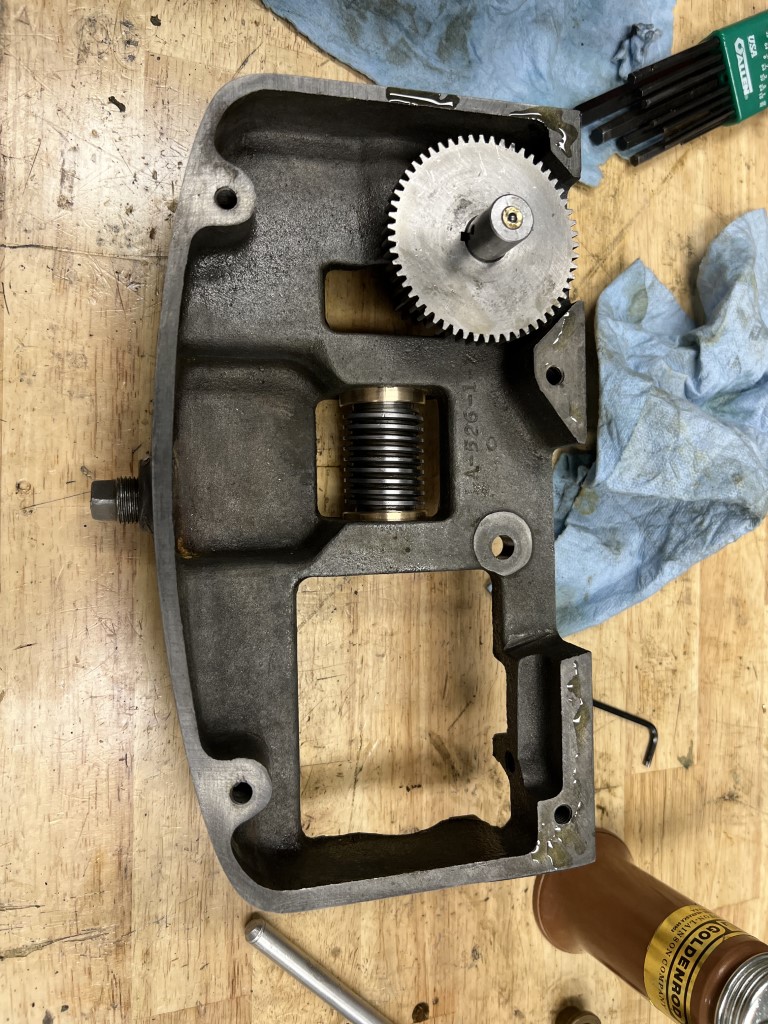
Apron Worm Gear Bushings
The (original?) worm gear bushings where worn roughly 0.015” diametrically.
This was unacceptable, so I made a replacement pair from bronze to fit the worm gear.
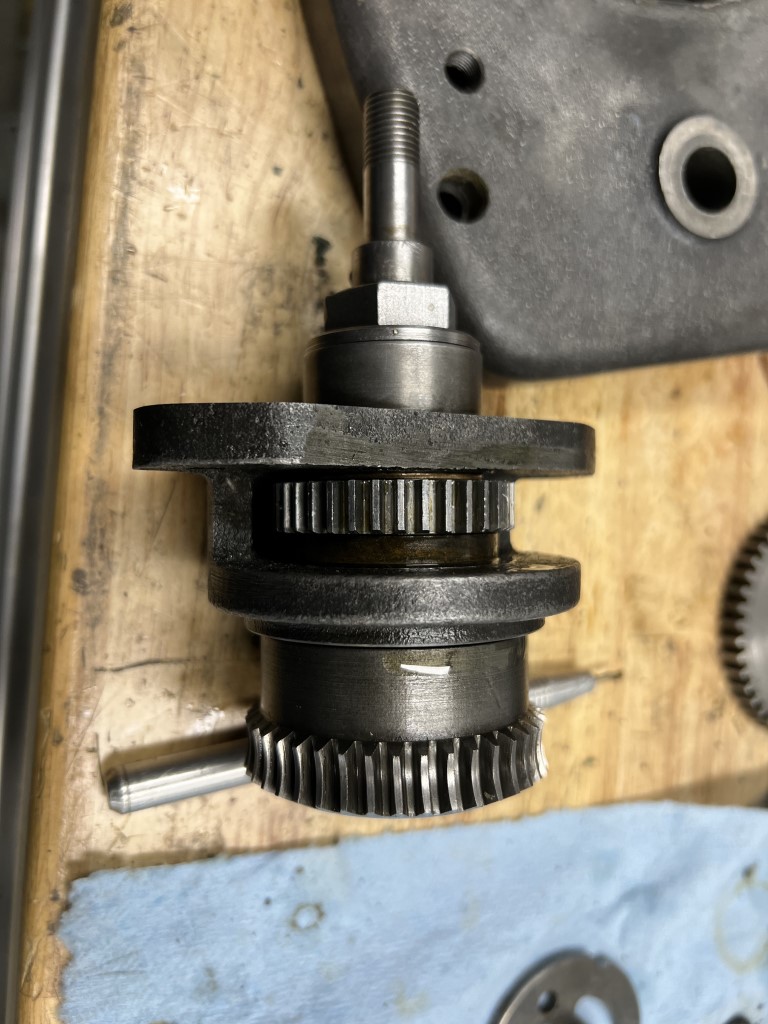
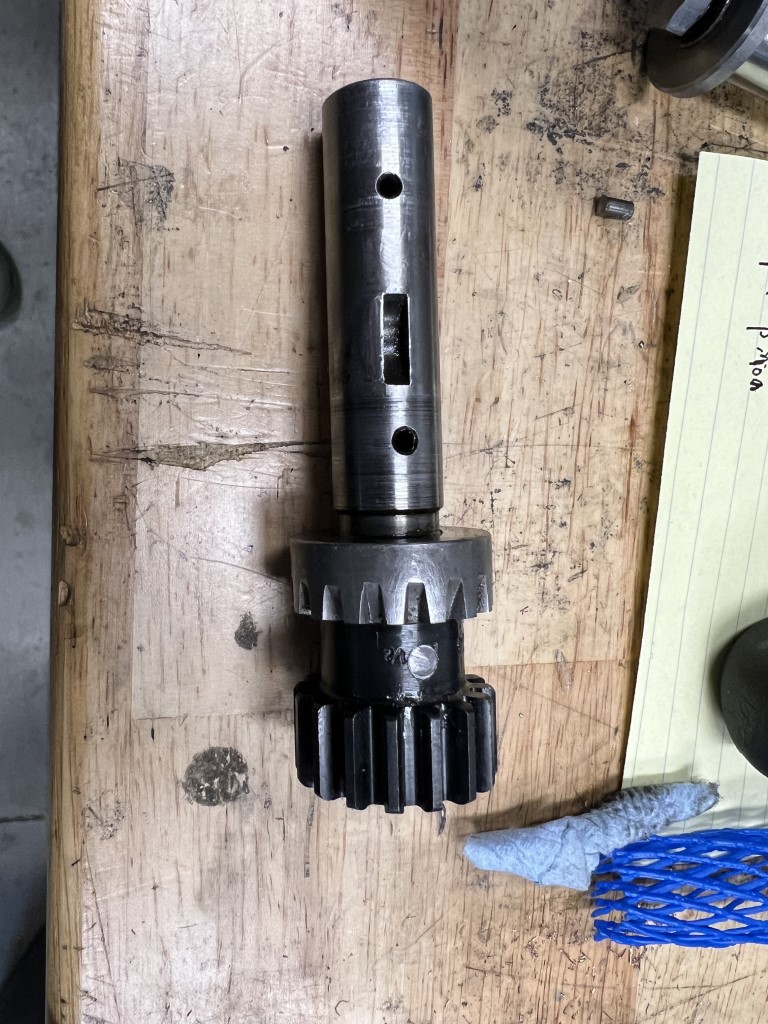
Apron Drive Pinion Replacement
The apron also came with a worn pinion gear that drives the carriage across a lathe bed. I chose to repair this.
This is the first in many gear related problems for the Logan lathe.
Don’t be discouraged, most gears are readily available as of 2022!
This is a 16T 16 Pitch stem pinion. There are no replacement stem pinion available commercially and for low price that will fit here.
The economical choice is a replacement spur gear fit to the original shaft.
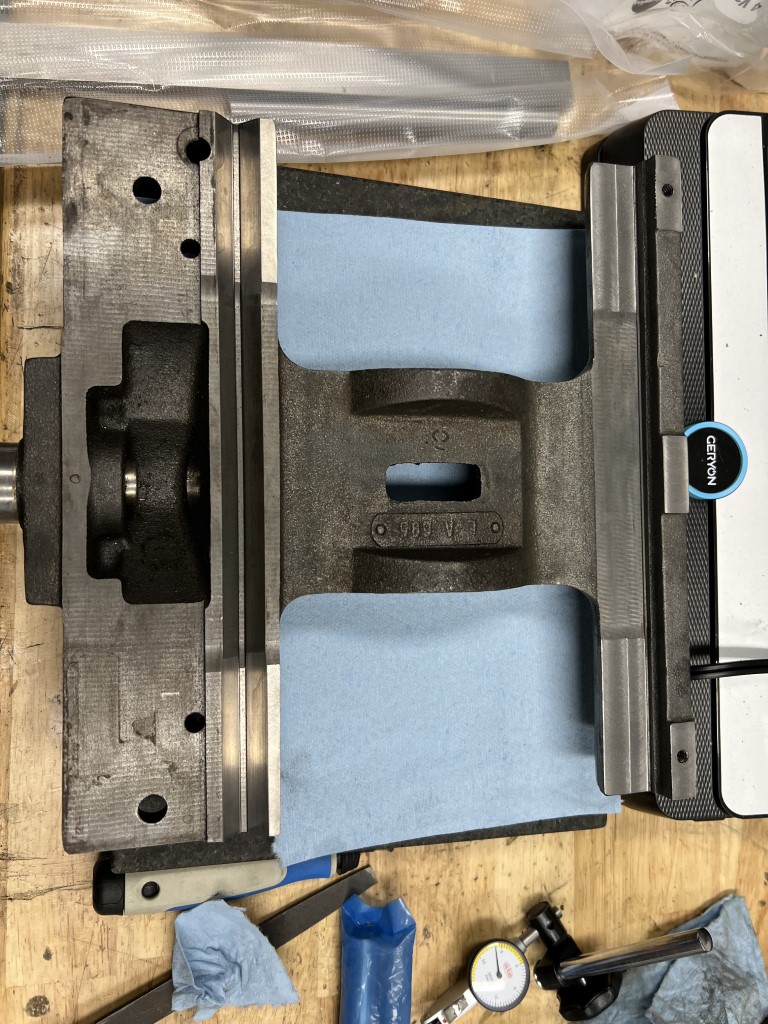
Saddle
I purchased a saddle that would fit the apron from eBay.
The one that I purchased included a rare cross slide that would fit to a taper attachment, but sadly that was broken in transit.
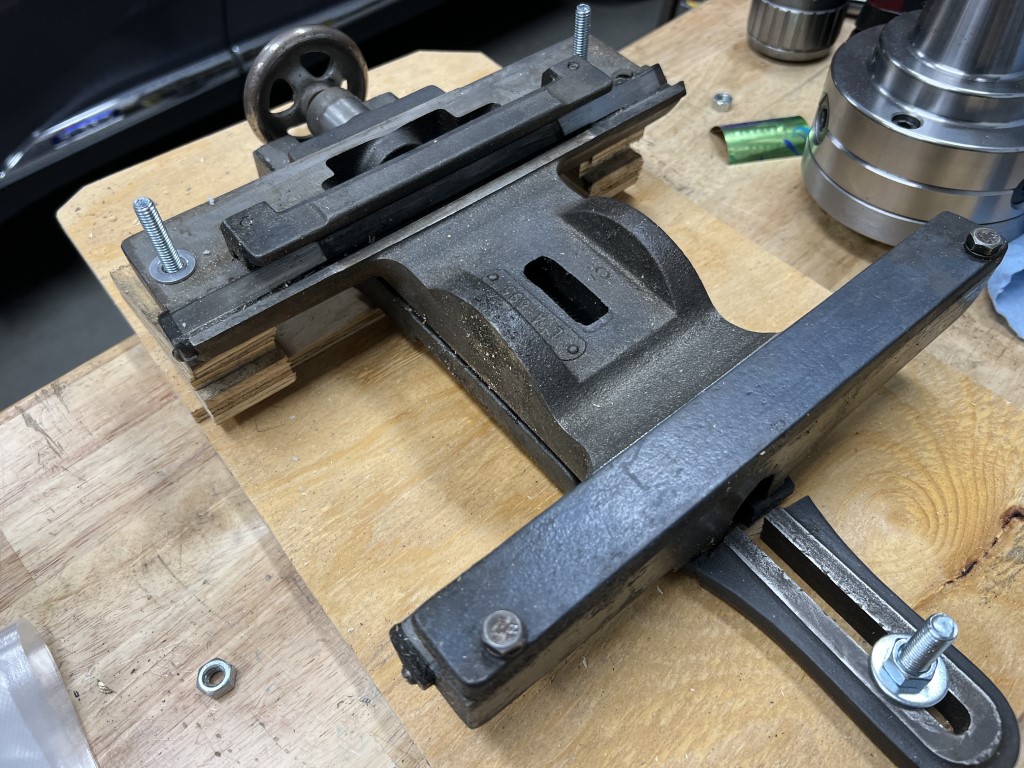
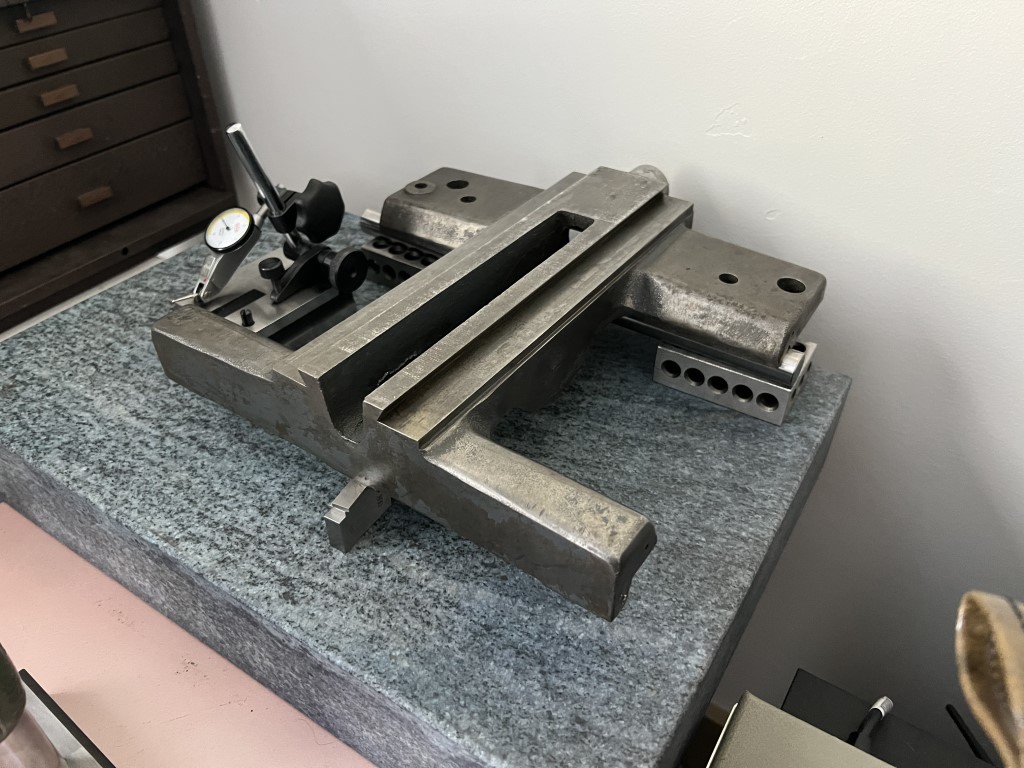
The saddle looked to be in excellent condition, and cleaned up easily.
Measuring the cross slide ways revealed less than 0.002” wear, which was significantly better that the original saddle ways I was used to using.
However, the bedways didn’t even come close to fitting my lathe bed.
Placing the saddle on the bedways resulted in it rocking back and forth.
Using shims, I measured about 0.010” rock. This was bad news.
Saddle Measurements
Given the extent of the problem, I embarked to define the issue further.
Using techniques described in “Machine Tool Reconditioning” I conducted a series of measurements.
Saddle Machining
As it turned out, there was enough wear that machining would be a necessary first step. I setup the saddle on the milling machine, and used gage blocks to align the surfaces in a way that would balance all the dimensions I had measured.
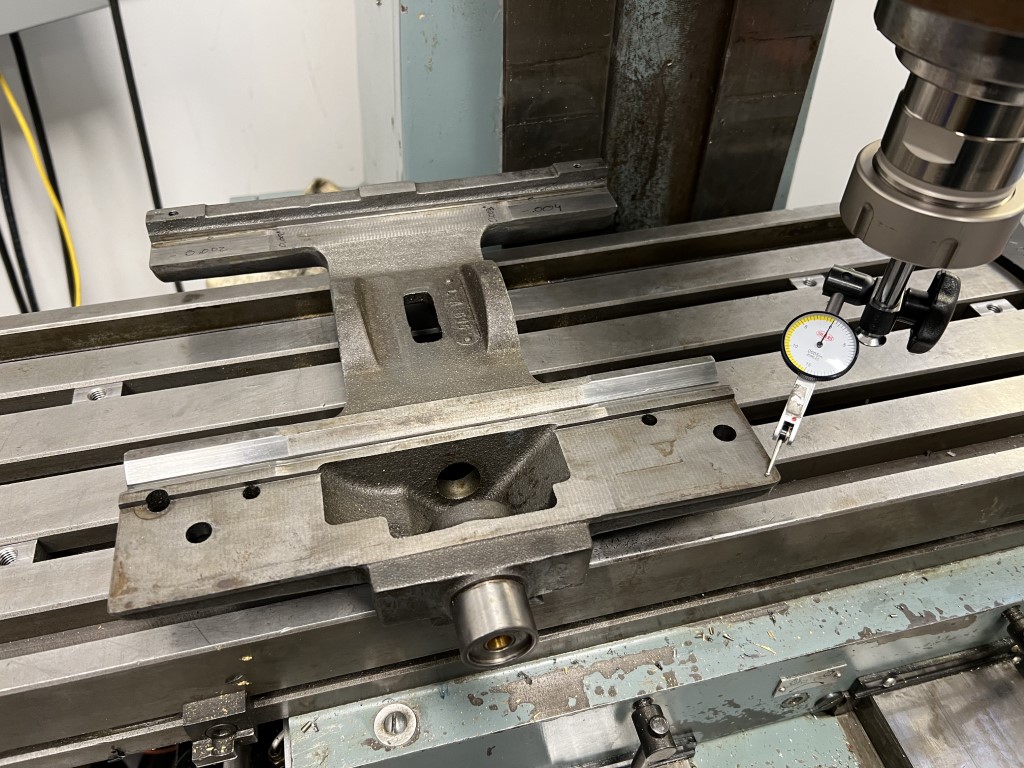
I only decided to machine the flat ways. I removed about 0.004” from them.
Saddle Scraping
Next, I could scrape the ways to fit the saddle.
This is the final bluing for each way surface.
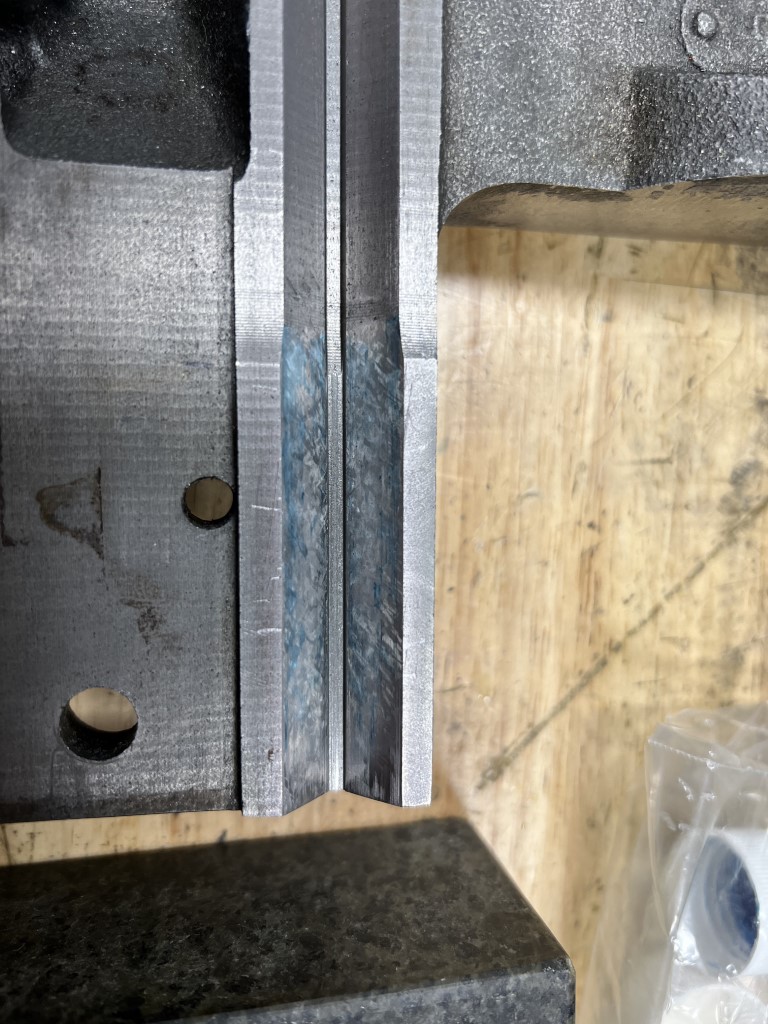
This isn’t the best job, but it’s definitely functional.
I know there is wear on the bedways themselves, so I chose not to get to carried away with the scraping.
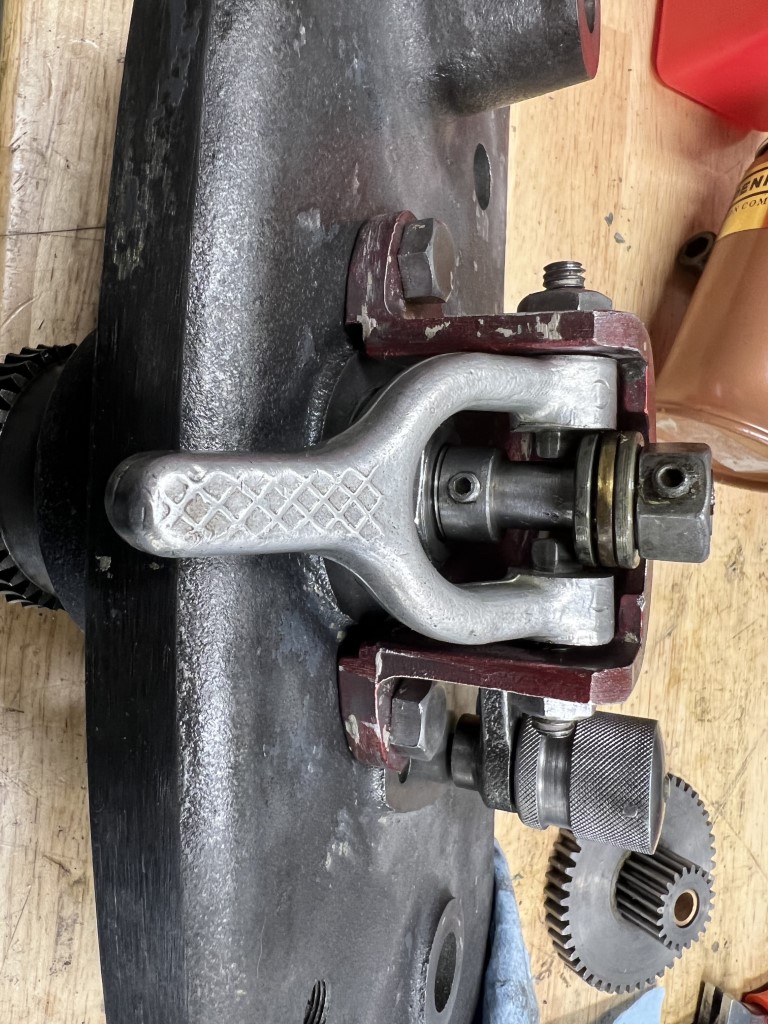
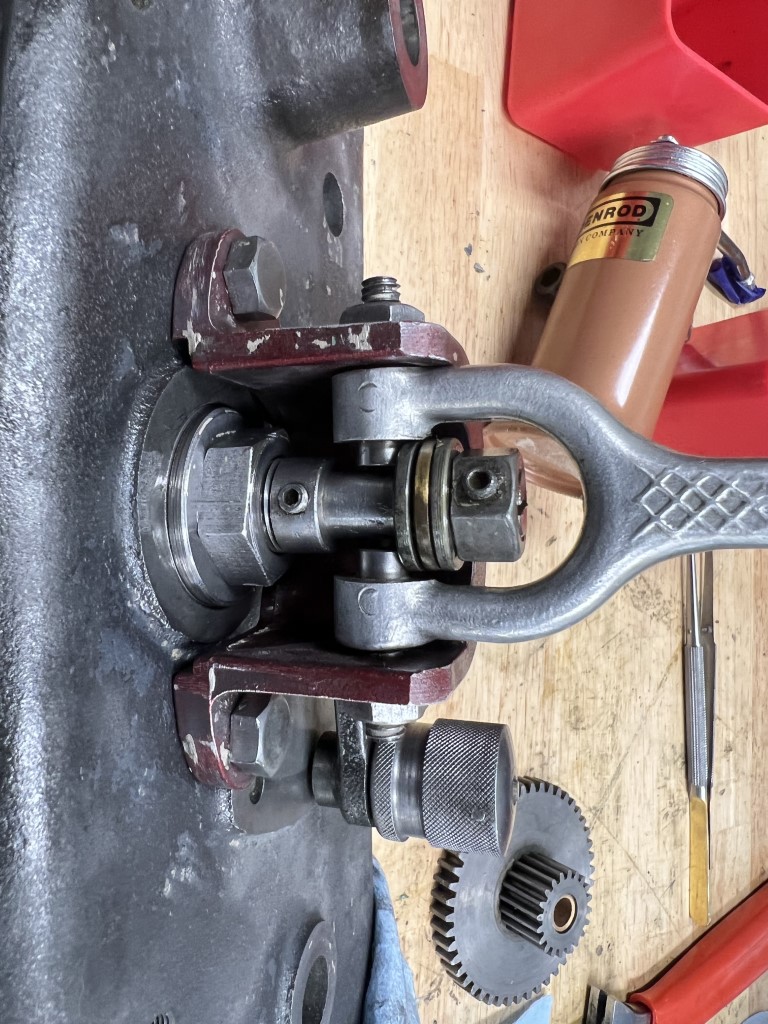
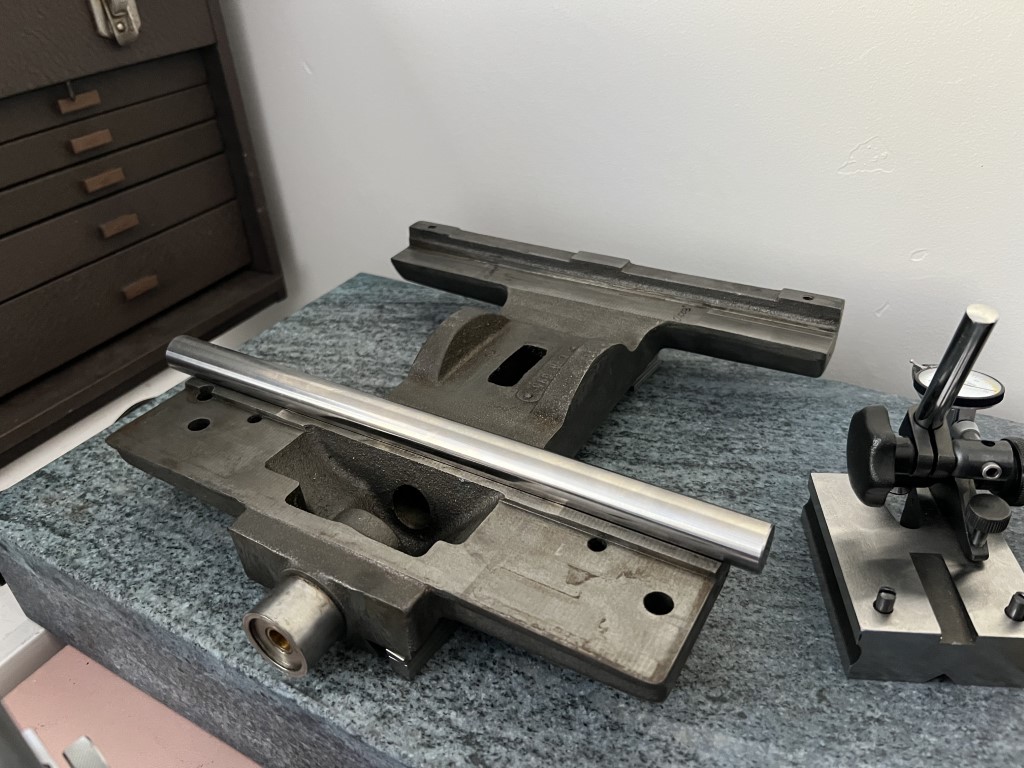
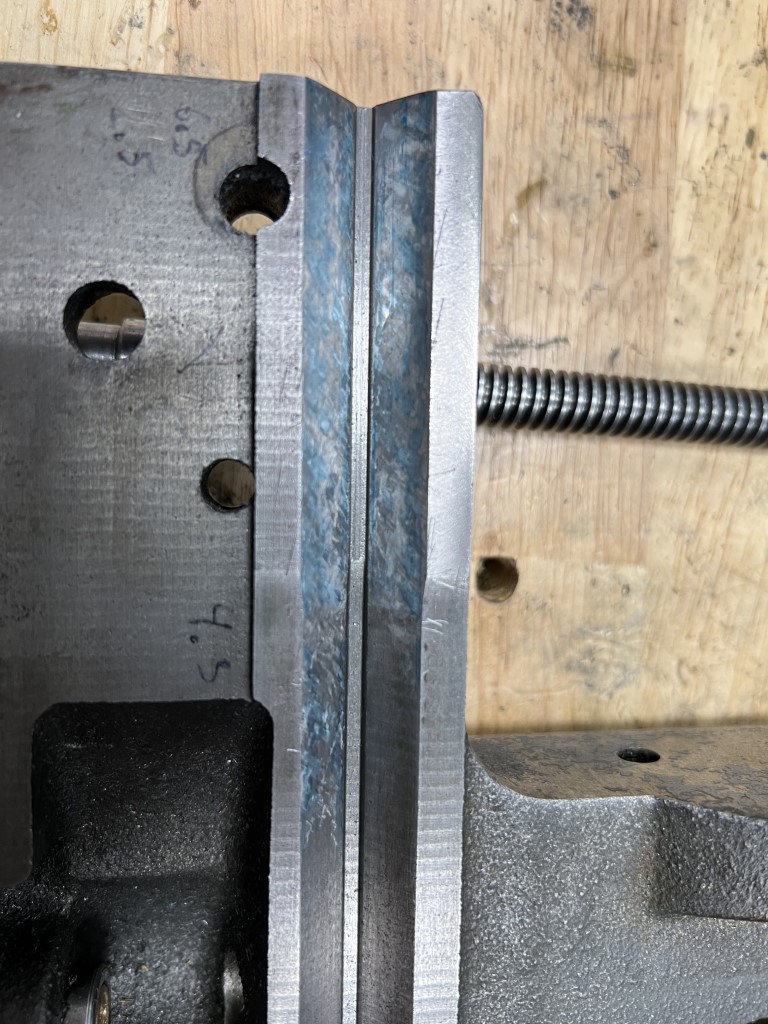
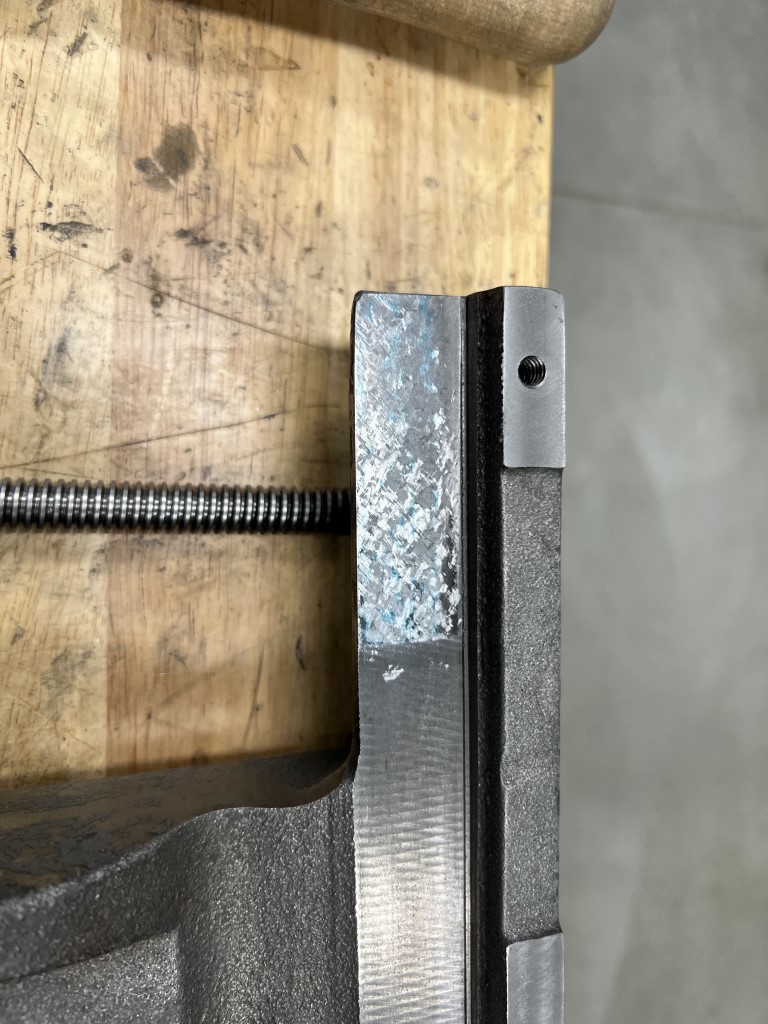
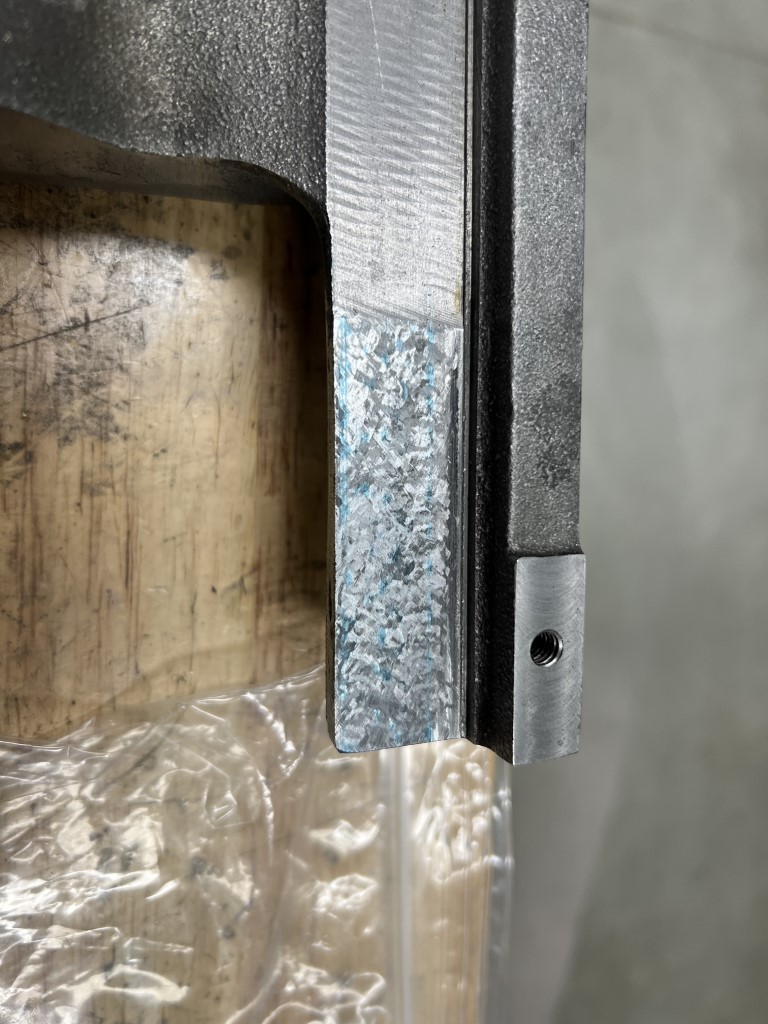
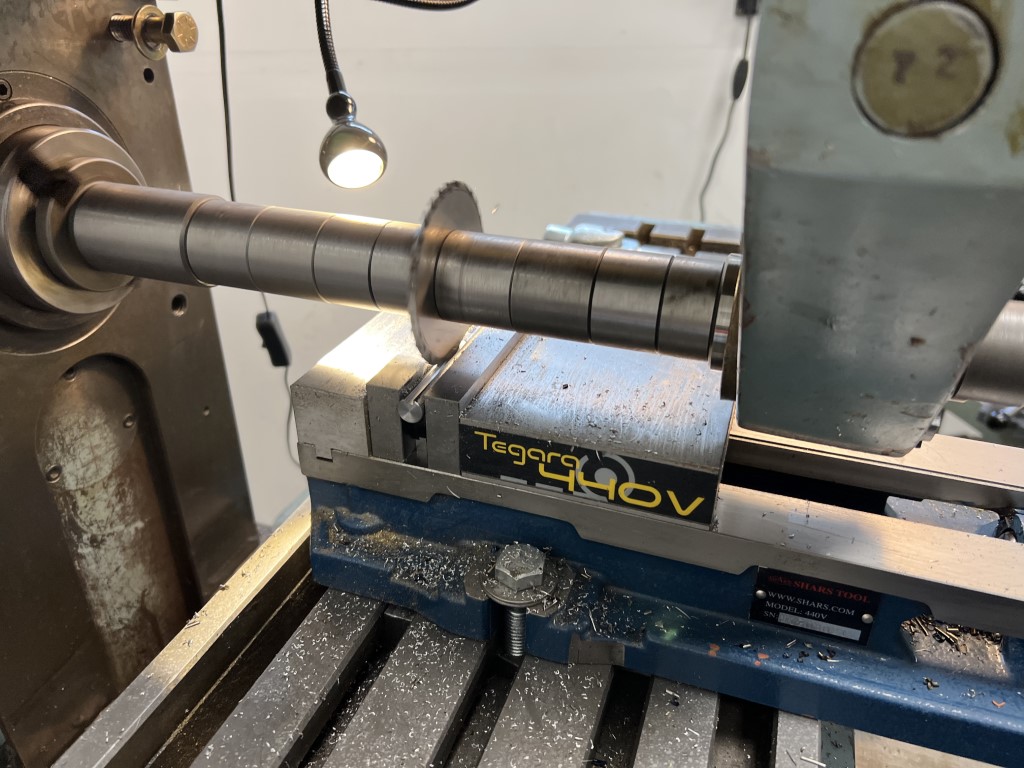
Leadscrew & QCGB Fit
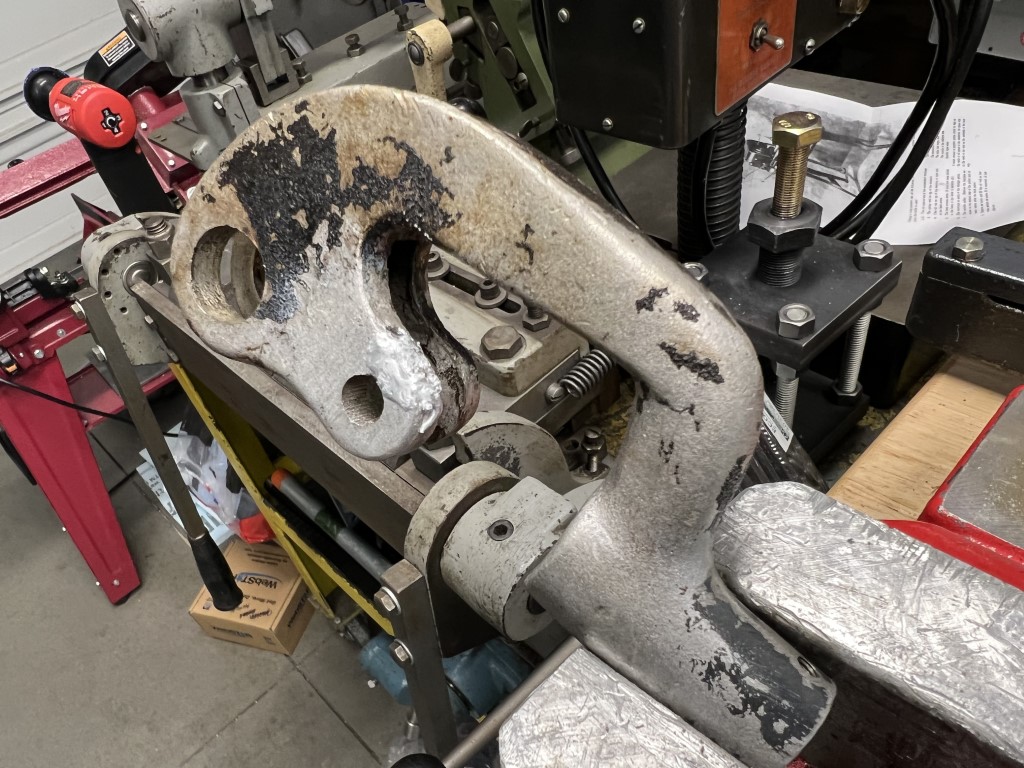
Next step was to assemble the saddle and apron, and determine where the leadscrew needed to be located.
The below picture shows the leadscrew fit to the apron, but with the original location of the tailstock side bearing support. As can be seen, the gearbox and the tailstock bearing support needed to be moved.
This was a very tedious and touchy process. I spent more time determining the proper location for the gearbox and bearing support than I did scraping the saddle.
In summary, the leadscrew needed to be straightened slightly, and wear in the bedways had to be accounted for.
While doing the experiment, I used gage blocks to control the location of both sides.
Then, when I had the correct measurements, I machined two spacers.
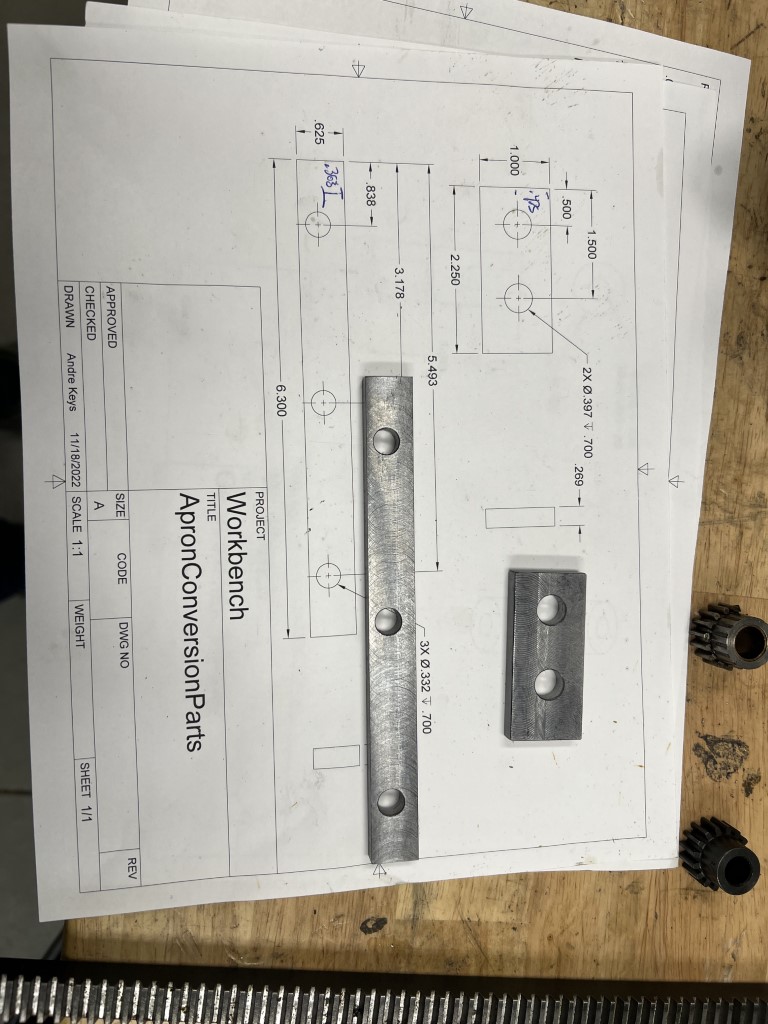
The gearbox was moved out 0.275” from the bed and down 0.018”
The tailstock support was moved out 0.269” from the bed, and down 0.018”
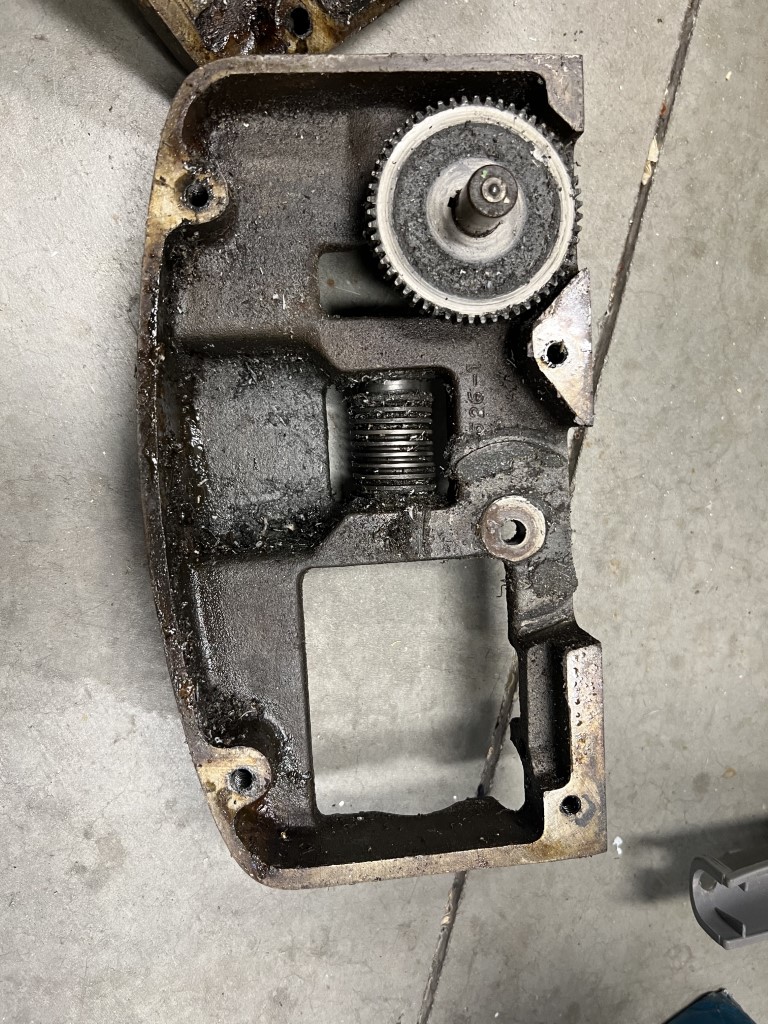
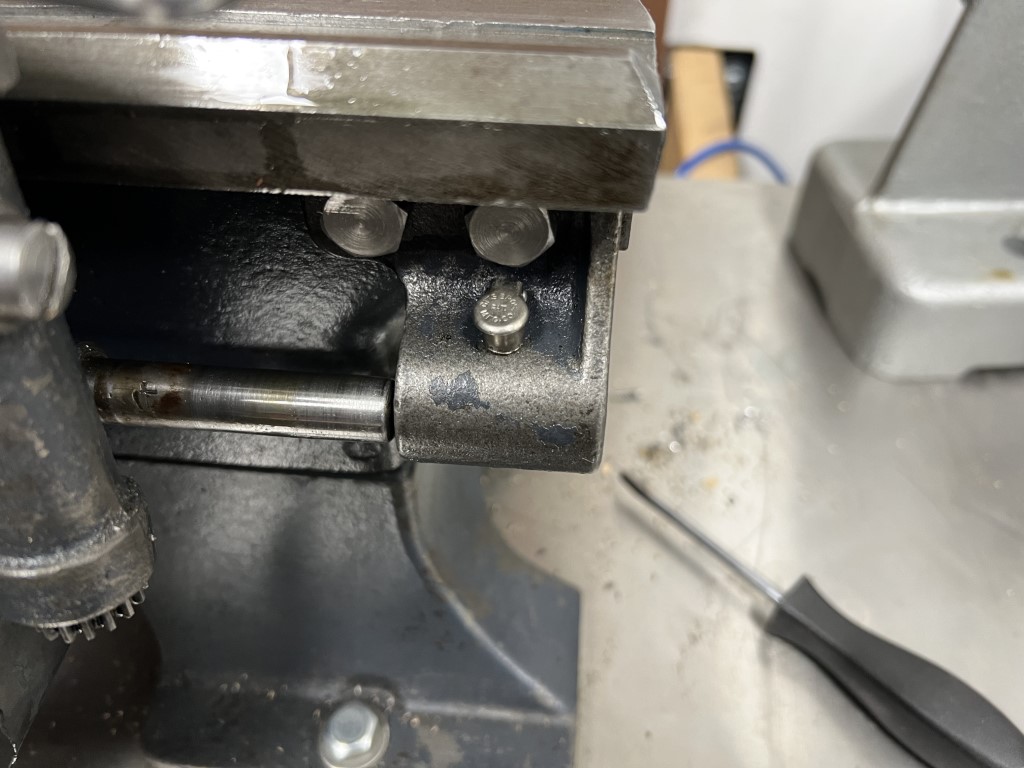
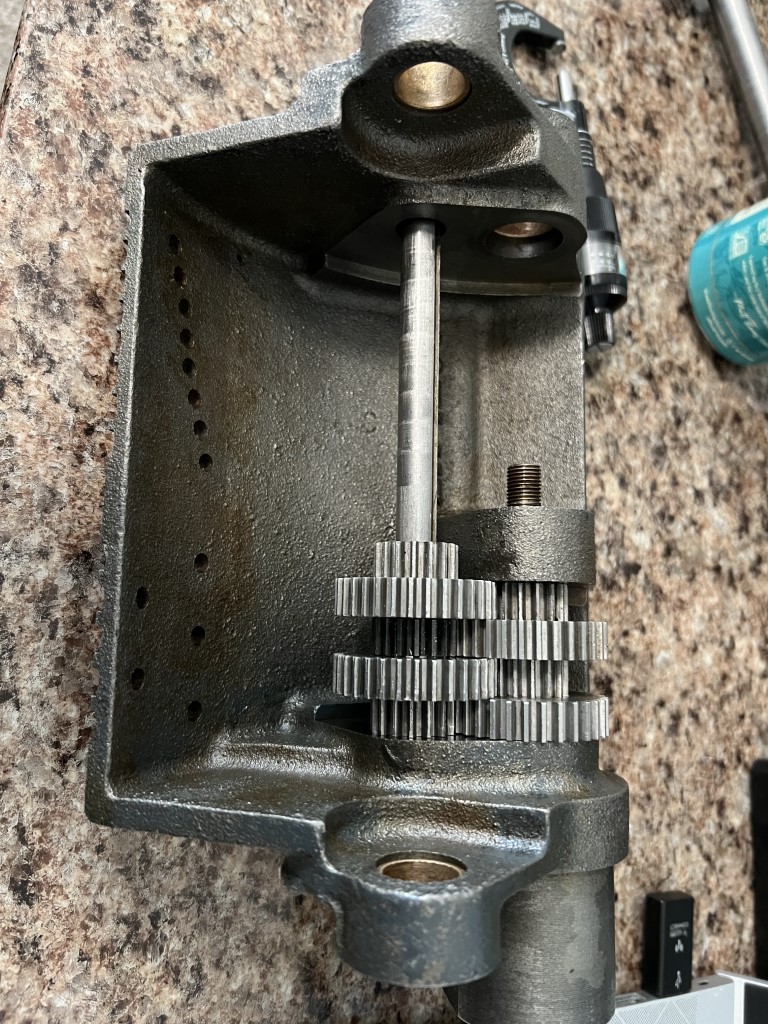
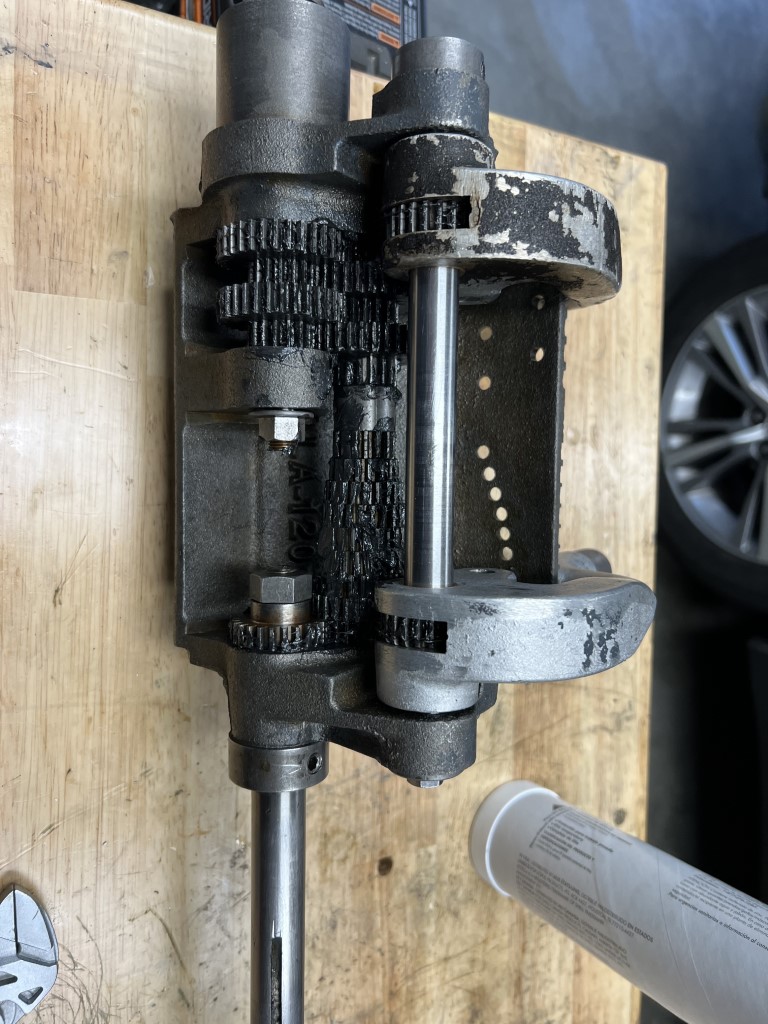
Quick Change Gear Box
The QCGB on the lathe was in good condition when I purchased the machine, but there were two existing problems:
- a crack in one of the gear select levers
- The ‘e’ gear was stripped, probably from a crash
I embarked to fix these as I already had the gearbox out, and ended up doing a complete rebuild of the gearbox.
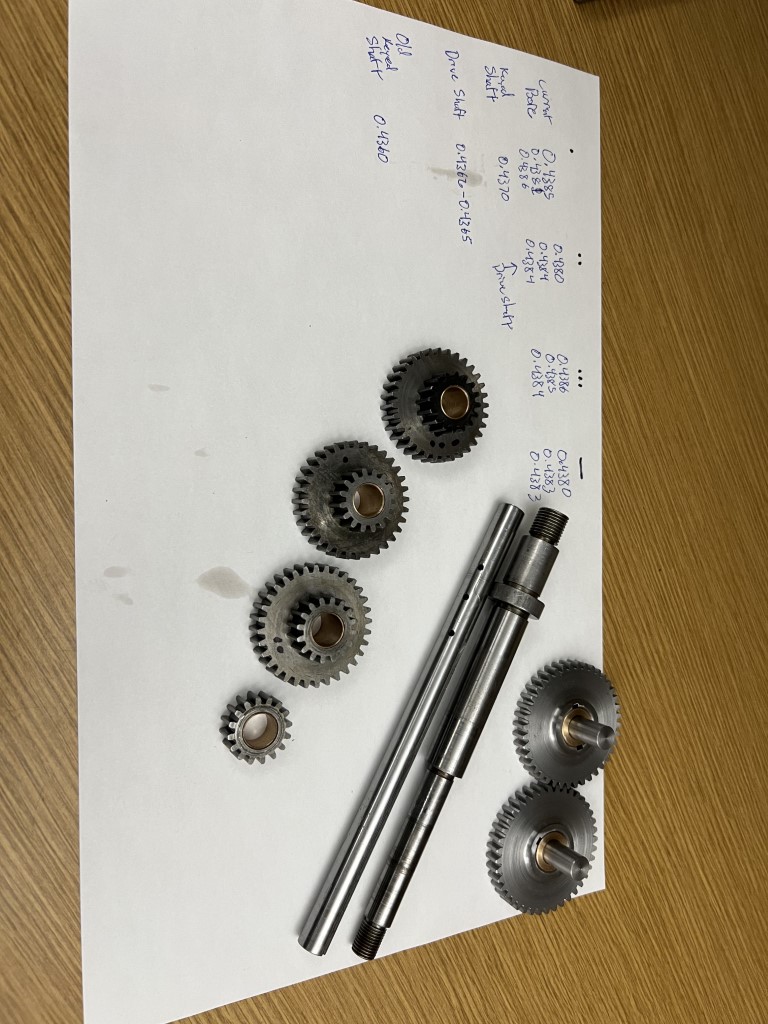
A note on the gears: All gears in the gearbox are 14.5 degree pressure angle, 20 pitch gears.
These are readily available from McMaster, or from Boston Gear. Don’t feel like you need to purchase old gears from eBay at a premium price. The ‘e’ gear I bought was about $20.
Gear Select Lever Crack Repair
The gear select levers on this machine are aluminum, and one of them was cracked.
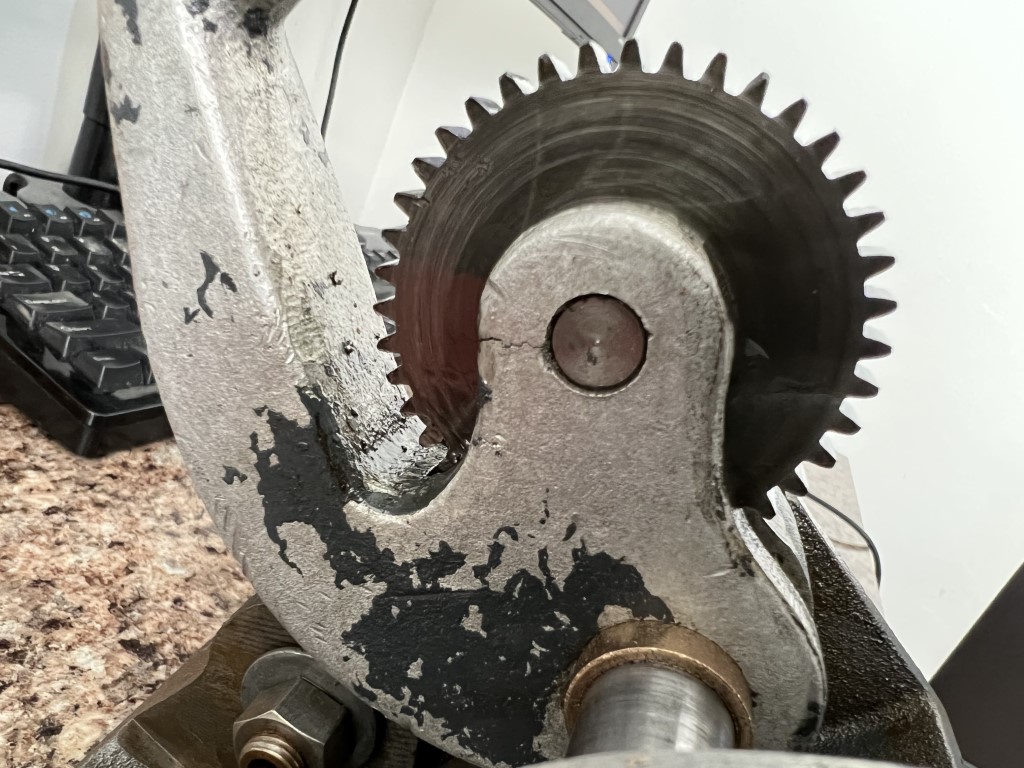
I chose to use Bernzomatic aluminum brazing rods to repair. The part was heated with a propane torch.
After the repair, the excess was filed down to match the gear select handle.
‘e’ (16T) Gear Replacement
Repairing the ‘e’ gear was fairly straightforward. I purchased a 16T gear from McMaster as the replacement. The gear already featured a shoulder, but it was too small for the bore of the matching 32T gear.
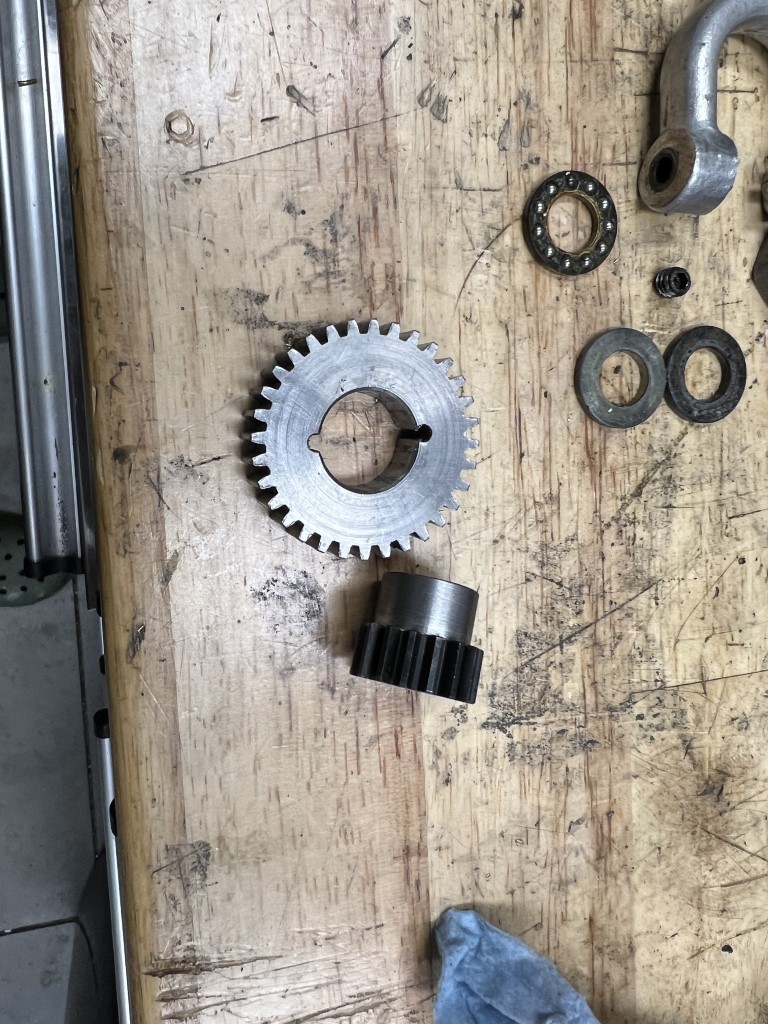
A simple bushing was an easy fix for this, and the new gear was pressed and pinned.
Mr Pete has a video on replacing this exact gear.
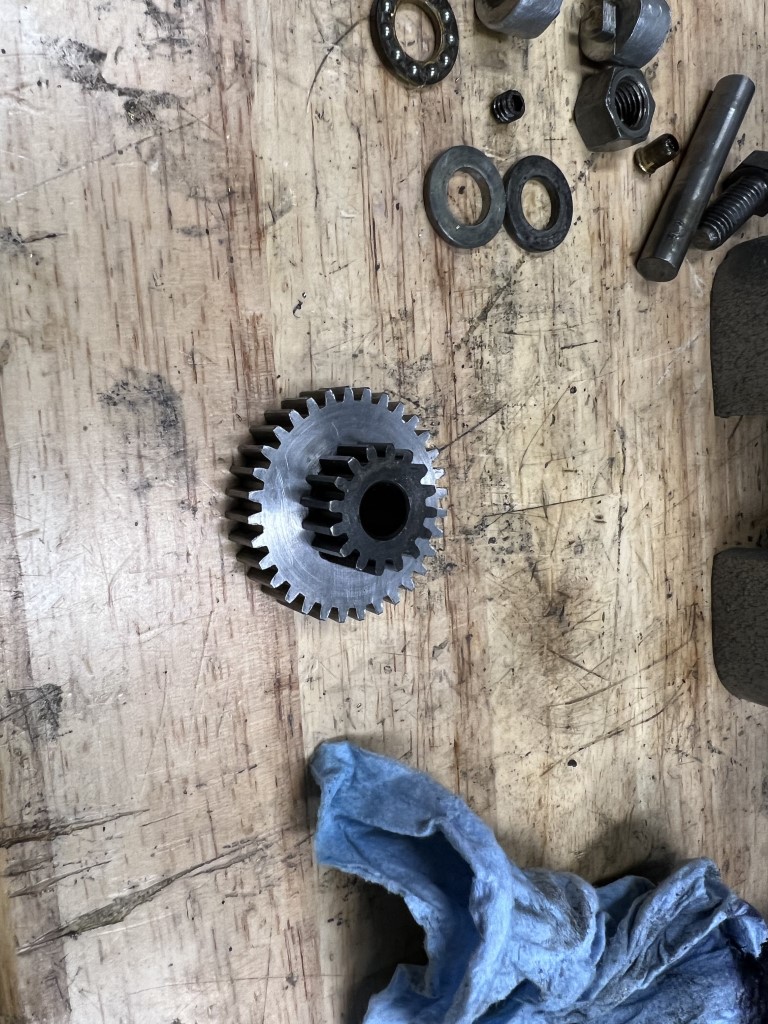
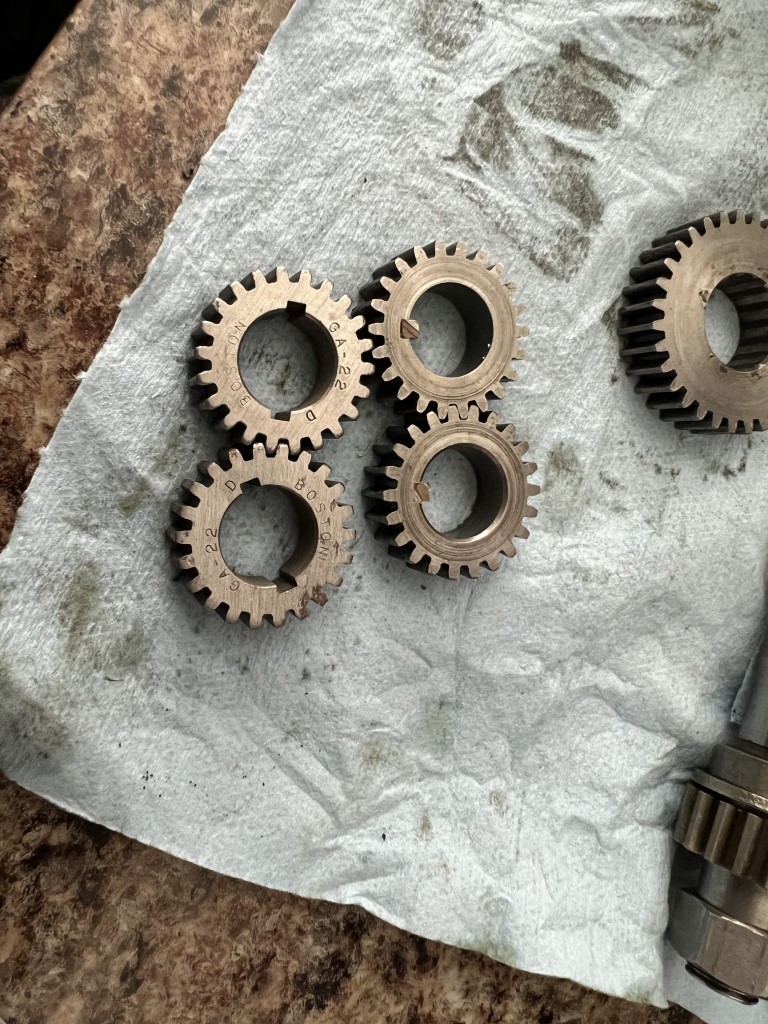
Gear Select Lever Gear Replacements
The gear select levers use two gears, a 22T and a 40T change gear. The 40T gear reaches into the gearbox to select a gear, and transmits that to the 22T gear, which is keyed to at 5/8” shaft.
All 4 of these gears were terribly worn, and I replaced them with new Boston Gear parts.
The 40T gears were the most expensive of the project, and took the longest time (about 1 month) to be available. I think they were about $50 each.
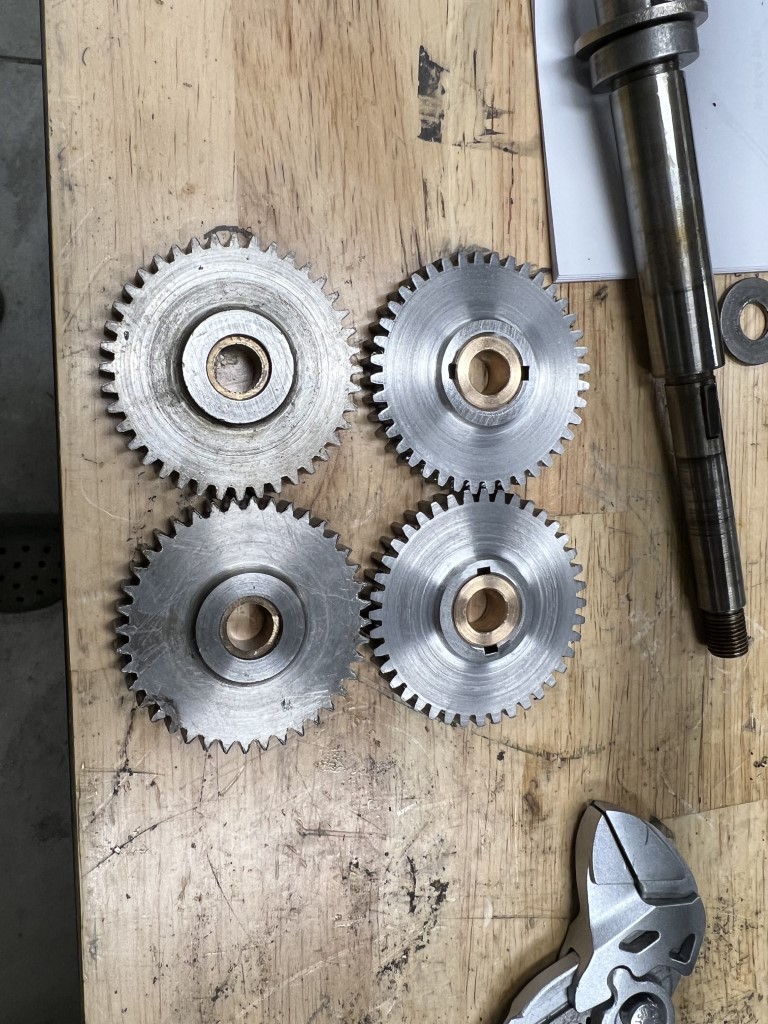
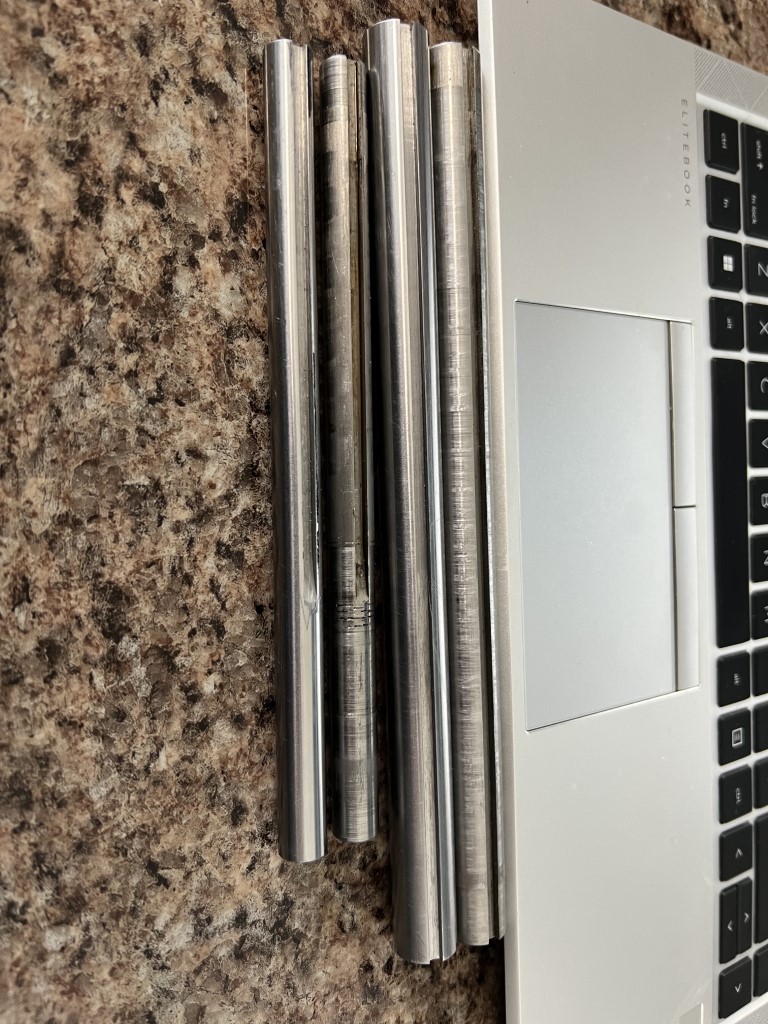
New shafts
I next decided to replace the internal shafts in the gearbox.
This would be a very simple task, and the original shafts where quite worn.
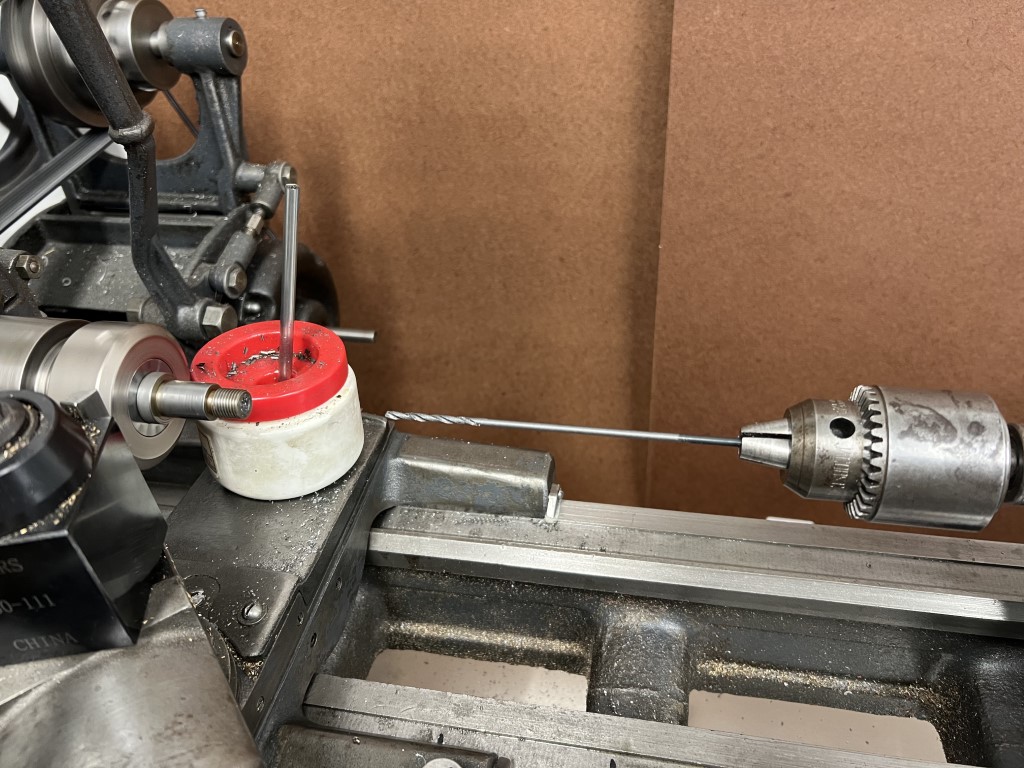
Lubrication
Lubrication was the next hurdle. I chose a moly grease for the gears themselves, but that wouldn’t help the shafts receive lubrication.
I ended up putting oil fittings at the end of each shaft, and a hole to a port under each of the gears. One of the shafts required a very long hole!
Assembly and Test
TBD
Lubrication
Quick Change Gearbox Lubrication
Apron Lubrication
All components where coated in way oil during final assembly. The two shells of the apron also received a silicone gasket to prevent a leaking oil bath.
The change gears in the arpon were coated with a small amount of Shell Rotella SD Special Duty Moly Grease.
The friction clutch oil bath was filled with #2 way oil.
Test
Testing went very well! Since no one on the internet seems to publish specifications for cuts, here is a table.
TESTING DATA
GIF